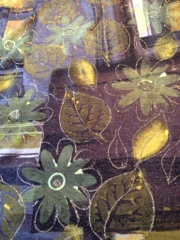
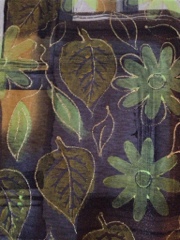
Had a great day with the ladies at Patchwork Corner. We used the inspira cut work needles in our sewing machines to make negative and positive squares to assemble as small simple bags r to make wall hangings. These little needles are just like having a tiny knife in the machine and replace the normal sewing machine needles to cut through the fabric and remove the shape from within it, making both the negative and positive shapes fully usable.
They are quite expensive and were designed for the embroidery machines with stitch out designs . I use only one of the four needles in a completely free manner to cut out my own hand drawn designs so you do need to work out wether they art going to be cost effective at £48 per set.
The company really needs to look at selling them two ways. Four needles for the embroidery design machines and a single needle for the normal domestic machine. As I have started to teach the technique it would be so good to be able to offer one needle for sale.
Hand embroidered and painted picture
I spend such a lot of time on my sewing machine that every once in a while I like to keep my hand in with some good old hand stitching.
This project is to learn how to put a random suggestion of water colour or acrylic paint down on to fabric to suggest a background scene which will be embellished or further stitched with traditional hand embroidery to bring-it to life.
It’s quite liberating to have the freedom to splash Paint on to a surface when you only have a vague idea of what you want to achieve, having said that it does give you a fairly open scope to play and grow the picture as you sew.
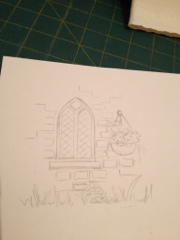
I wasn’t sure how to go about it so I started with a plain white piece of fabric and lightly traced a basic window, bricks and a hanging basket in place. This gave me the areas I needed to consider for specific colours and the rest-of the area was then just a wash of these same colours.
I then spent a pleasant couple of evenings using simple stitches such as French knots, stem stitch, back stitch, straight stitch, chain stitch and several others to enhance area like the individual bricks, the hanging basket and adding a grassy border to bring the paint and the embroidery together.
Lutradur picture
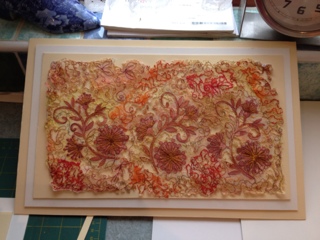
Just mounted this piece of painted, stamped, stitched and heat stressed piece of Lutradur ready to get framed. I really like this technique as you can do the same over and over again and get a different result every time. Considering I used red and bright yellow Lutradur layered on top of the piece which burnt back when I heat stressed it . I love the colour it turned out and that it is finished at this point. I did look at it and think maybe I needed to add beads or hand stitching but decided not to .
Lutradur Teaching Samples
Today I felt motivated to get my act together and sort out my Lutradur workshop coming up at Husqvarna Studio, Nottingham. Next problem is how to send it in the mail but that can wait till tomorrow.

Gold work hummingbirds
After a really hectic day of clearing an overgrown garden ( not mine, my daughters) I found a spare hour to finish and stretch my gold work embroidery ready to be framed and displayed at the shop next week.
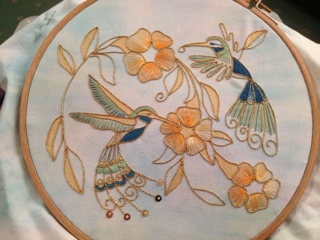
It’s been a real pleasure having this embroidery on the go in the evenings. It is predominately worked in satin stitch where I needed the hummingbirds to say blue/green, with couched gold cord. No padded gold leather on this piece which should please many of the students. They find the leather work hard going on heir fingers. As usual my signature painting in of areas using gold acrylic paint has snuck in giving another texture and tone to the gold being used to outline the design. The flowers have been worked in long stitches with variegated yellow/orange stranded floss with gold machine thread worked in-between each one.
I painted the background fabric with my watercolour paints to get a soft blue Hugh
Fancy dress for Maddy
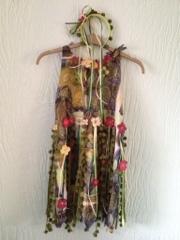
Spent a really pleasant day finishing Maddy’s mid summer nights dream dress for world book day at school . I was looking through my craft stuff and came across a box of red, pink and lime flowers which were ideal for attaching onto the dresses ribbon strands and neckline. The head dress was made up from the left over ribbons and flowers. I hope it fits and isn’t to long or worst doesn’t fit. I’m taking it down to her this Wednesday and really hopes she likes it.
Painted woodland fancy dress for Maddy
My sis in-law has been in touch and asked for help with a fancy costume for my nieces World book day at school in Early March. I said leave it with me and now I’m so exited that I have spent most of the day fiddling about and stamping a piece of fabric to make it from. Yesterday a good friend said she had some jersey that I could have so I stocked up on trimmings and ribbons to decorate it and away I went today. So far I have stamped images of flowers and leaves over the top of the square fabric acquired to make it look more forest like ( the book my nice has chosen is “a mid summer nights dream” and she wants to go as one of the woodland nymphs.) I have also painted an old head band which I will customise with flowers and leaves wired to it. eBay has found me some yellow tights and a cheap lime green t shirt which I will also paint and alter. Along with some woodland bangles and a necklace that I need to quickly create. This will complete the look.
So far I have cut the dress out stamped and glittered it and am just starting to add the ribbons to it. I just need to then sew the two side seams together and that’s it. I am not sewing the shoulders together as my friend had the good idea that my sis in- law would then be able o tie the shoulders as straps, therefor she could adjust the if needed.
Check it out so far.
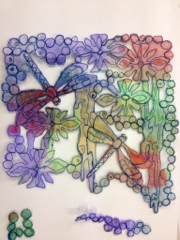
Machine embroidered and soldered dragonfly panel
I had a lovely time at Tudor rose patchwork shop on Saturday where eight ladies worked so hard to achieve their panels. Several had never done free motion embroidery before but they sat quietly and by the end of the day they turned out a very high standard piece of work for a first attempt. I was so pleased for them and hope it has inspired them to join me in some other classes
Machine embroidered tiles 2nd day
Today’s weather wasn’t much of an improvement on yesterday’s so I spent a second day glued to my sewing machine. I am hooked on embroidering these little squares and am pleased with the final outcome. I would love to find time to make some more to use as greetings cards and I can now keep my scissors safe with a posh new scissor keep also made from two of the little embroideries . Found my stick it and save it book where I had some more small embroidery tile samples so now all I have to do is drop everything off at the shop and hope they inspire students to book on the workshop.
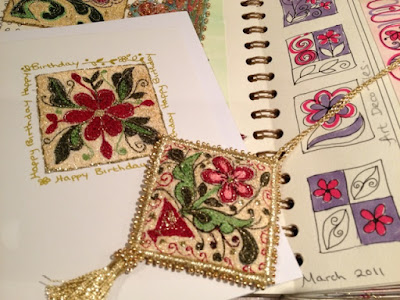
Machine embroidered Art Deco tiles
It was sooooooo cold today and going out was not something I fancied so I busied myself and spent a very pleasant day sewing on my sewing machine and making my next workshop sample.
These little embroidered tiles are 2″x 2″ in size and made entirely from stitching. I cut them out close to their edges and then used glitter glue to seal the stitch edges. I just need to think about how to mount them now and that will be another sample done and out of my hair


